

How to Look Slimmer in Photos: 12 Tricks Without Filters
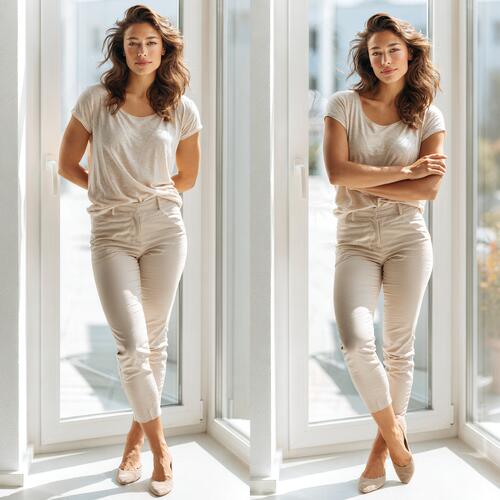 How to Look Slimmer in Photos: 12 Simple Tricks Without Filters
Sometimes a person looks in the mirror and likes what they see, but then looks at a photo and is surprised: why does the body look wider, the legs shorter, and the posture worse?
It's not always about appearance. The camera captures volume differently than the human eye. The result is affected by the distance to the lens, the position of the phone, lighting, pose, clothing, and even where the toes are pointed.
To look slimmer in photos, you don’t have to suck in your stomach, use strong filters, or hide behind other people. It’s enough to minimize camera distortions and choose a position where your body looks natural.
Let’s look at 12 simple tricks that are useful for full-length photos, family pictures, selfies, vacation shots, and tracking weight loss progress.
Why You Can Look Heavier in a Photo Than in Real Life
Photography turns three-dimensional space into a flat image. Because of this, objects and body parts closer to the camera appear larger.
Distortions are especially noticeable when:
-
the phone is too close;
-
a wide-angle camera is used;
-
the photo is taken from above or below;
-
arms are pressed tightly to the body;
-
the person stands straight in front of the camera;
-
clothing bunches up in folds;
-
light falls strictly from above;
-
the photo is cropped at an awkward spot.
Therefore, don’t judge your figure by one random shot. An unflattering photo only says that the combination of lighting, angle, and timing was not ideal.
1. Move a Little Further from the Camera
The main mistake when shooting on a phone is that the camera is too close.
The closer the lens, the larger the body parts in front appear. In a portrait, the face can look bigger; in a full-length shot, it may be the stomach, shoulders, or hips.
What to do:
-
Place the phone a few meters away.
-
Use a timer or ask the photographer to step back.
-
If necessary, slightly zoom in using optical zoom.
-
Don’t use wide-angle mode for full-length photos of people.
It's especially important to keep distance for group photos. People standing at the edges of a wide-angle frame often look wider due to lens distortion.
2. Place the Camera at Waist or Chest Level
A camera placed too low can visually enlarge the lower body. From too high an angle, the head may look bigger and the legs shorter.
For full-length photos, usually, the camera should be approximately at waist or lower chest level.
It’s best to hold the lens parallel to the floor. You don’t need to tilt the phone forwards or backwards much.
For portraits, the camera can be slightly above eye level. But don’t raise it too high, or face and body proportions will look unnatural.
3. Don’t Stand Strictly Facing the Camera
Standing straight in front of the lens shows the maximum width of the shoulders, waist, and hips. This is necessary for documents, but for regular photos, a slight turn often works better.
Turn your torso about 30–45 degrees and direct your face towards the camera.
This pose:
-
creates a more defined silhouette;
-
visually emphasizes the waistline;
-
adds depth to the photo;
-
looks more natural than a strict front-on stance.
There’s no need to turn fully sideways. A slight twist is usually enough.
4. Shift Your Weight to the Back Leg
If you stand evenly on both feet and tense up, the pose can look heavy.
Try shifting most of your weight to the leg furthest from the camera. Place the other leg slightly forward or to the side.
You can bend the front knee a bit. Point your toe straight or at a diagonal angle.
This position helps visually lengthen your legs and makes the pose less static.
Don't try to copy a complex runway pose. Your position should remain stable and comfortable.
5. Leave Space Between Your Arms and Body
When arms are pressed tightly to the sides, they look wider and hide the waistline.
You don’t need to stick out your elbows much. It’s enough to create a small space between your arm and torso.
You can:
-
put one hand on your waist;
-
slightly bend your arm at the elbow;
-
hold a bag to the side;
-
touch your hair or collar;
-
let your arms relax at your sides, but don’t press them to your body.
If you put your hand on your waist, don’t raise your shoulder or stick your elbow out too much. The pose should look relaxed.
6. Stretch Upwards, But Stay Relaxed
Posture noticeably influences how the figure looks.
When you slouch, your shoulders move forward, the neck seems shorter, and the stomach area becomes more noticeable. On the other hand, over-arching your back and sticking out your chest is also unnecessary.
Before the photo, imagine the crown of your head gently stretching upwards.
Then:
-
lower your shoulders;
-
slightly pull your shoulder blades together;
-
relax your stomach;
-
evenly stretch your spine;
-
don’t lift your chin.
Even a small change in posture helps you look more put-together and confident.
If you want to work on your posture not only before the camera, add back and core exercises. You can use the program from the article «Strength Training for Women at Home».
7. Move Your Chin Slightly Forward
Trying to lower your chin too much often creates folds on your neck. Raising your head too high can make the face look tense.
Try to slightly extend your chin forward and then lower it just a bit.
The movement should be minimal. From the side it is almost unnoticeable, but it helps define the jawline more clearly.
You can practice in front of a mirror or by recording a short video. On video, it’s easier to see which head position looks most natural.
8. Stand Facing the Window
Soft light from a window is usually ideal for portraits and full-length photos.
Stand facing or slightly sideways to the light source. If the window is directly behind you, your face may turn out dark and the contours of your body may be lost.
Try to avoid:
-
a bright lamp directly overhead;
-
midday sun from above;
-
mixing yellow and cool lighting;
-
harsh shadows on the face;
-
flash in a dark room.
Outdoors, it’s best to take photos in the morning, closer to the evening, or in light shade.
Don't look for lighting that completely hides your body’s features. The aim is to maintain dimension and not create unnecessary shadows.
9. Choose Clothes That Fit Properly
Clothes that are too tight bunch up in folds and can disrupt your proportions. Items that are too loose can completely hide your shape and make the body look larger.
Clothing usually looks best in photos when it:
-
fits your size;
-
does not squeeze the body;
-
does not bunch up around the stomach;
-
defines the waist or hips;
-
allows you to move freely;
-
maintains a clear silhouette.
This does not mean you always have to wear fitted clothes. A loose shirt, blazer, or dress can also look great if it keeps its shape and doesn't become shapeless.
Before shooting, smooth out folds, check the position of your collar, belt, pockets, and fasteners.
10. Use Vertical Lines and Calm Color Combinations
Vertical details help direct the viewer’s gaze from top to bottom.
These could be:
-
an open blazer;
-
a long shirt;
-
vertical stitching;
-
a row of buttons;
-
a long pendant necklace;
-
creases on pants;
-
combining items in similar shades.
You don’t have to wear all black. Any calm combination works well when the top and bottom don’t sharply divide the body into horizontal segments.
Color alone doesn’t make you look slimmer. The main thing is the fit, fabric quality, and overall silhouette.
11. Watch the Background and Horizon Line
Even a good pose can get lost on a busy background.
Before taking a photo, check if behind you there is:
-
a door frame that looks like it’s coming out of your head;
-
bright objects;
-
a large number of small details;
-
a horizontal line at waist level;
-
furniture that visually widens your silhouette;
-
mirrors reflecting the photographer.
For full-length photos, a plain wall, street with perspective, path, light room, or solid-color curtain works well.
Leave a little space above your head and below your feet. Don’t crop the picture exactly at your knees, elbows, wrists, or ankles.
12. Don’t Freeze in Front of the Camera
The more someone tries to strike a perfect pose, the more tense the photo can look.
Try adding a little movement:
-
take a slow step;
-
turn toward the camera;
-
adjust your hair;
-
slightly rotate your shoulders;
-
look away, then at the photographer;
-
shift your weight from one foot to the other.
It’s better to take a series of shots rather than try to get the perfect one on the first try.
During movement, clothes fall more naturally, hands are freer, and facial expressions become livelier.
How to Look Slimmer in Photos While Sitting
In a sitting position, the body naturally makes folds. Everyone has them regardless of weight and it doesn't mean something is wrong with your figure.
For a flattering sitting photo:
-
Sit closer to the edge of the chair or sofa.
-
Don’t lean your whole back against a high backrest.
-
Slightly stretch upwards.
-
Position your legs diagonally to the camera.
-
Don’t press your hands to your stomach or thighs.
-
Slightly turn your torso.
-
Don’t photograph yourself from too close a distance.
If you’re sitting at a table, don’t lean your whole body towards the camera. It is better to move the phone a bit away and use a timer.
How to Look Slimmer in Selfies
The same rules for distance and lighting apply to selfies.
Hold the phone slightly above eye level, but don't lift it too far overhead. Turn your face a few degrees, find soft lighting, and don't hold the lens too close.
To reduce distortion:
-
extend your arm further;
-
use the timer;
-
rest the phone on a surface;
-
don’t place your face at the edge of a wide-angle frame;
-
wipe the lens before shooting;
-
don’t use maximum digital zoom.
A clean lens sometimes makes more difference than a new filter.
Beautiful Photo vs Progress Photo: What's the Difference
For regular photos, you can choose flattering angles, poses, and lighting. But photos you use to track weight loss should be as identical as possible.
For honest comparison, take photos:
-
in the same clothes;
-
with the same lighting;
-
at the same camera distance;
-
in a neutral pose;
-
at about the same time of day;
-
from the front, side, and back;
-
without filters and retouching.
There's no need to take photos every day. It's easier to compare body changes over a few weeks.
Read more about this in the article «How to Measure Weight Loss Progress Without Scales».
Don’t delete old photos just because you don’t like them. In a few months, those photos may reveal changes you have a hard time noticing in the mirror.
What To Do If You Don’t Like Your Figure in a Photo
Don’t start a strict diet because of one photo.
First, check:
-
was the camera too close;
-
was a wide angle used;
-
were you standing at the edge of the frame;
-
was the light falling from above;
-
was clothing bunched up;
-
was the shot taken during movement or while talking.
One photo does not show your body composition and does not reflect real weight loss trends.
It’s better to assess changes using several indicators:
-
average weekly weight;
-
waist and hip measurements;
-
how your clothes fit;
-
photos under the same conditions;
-
well-being;
-
physical endurance.
The article «What Matters More When Losing Weight: Weight or Measurements» explains in detail why the scale number doesn’t always match visual changes.
How to Track Changes in SIT30
A good photo helps you see your figure without excessive distortions. But real weight loss results are achieved not with a pose, but with regular habits.
In the SIT30 Calorie Counter, you can:
-
calculate your individual calorie norm;
-
keep a food diary;
-
track protein, fat, and carbohydrates;
-
log your weight and body measurements;
-
track changes in indicators;
-
add notes about your well-being;
-
analyze trends over extended periods.
Save progress photos separately, and log your weight, measurements, and food in the app. Together, this data gives a more objective picture than a random photo or a single weigh-in.
Open the SIT30 Calorie Counter
Quick Photo Prep in 30 Seconds
Before pressing the camera button:
-
Wipe the lens.
-
Stand facing the light.
-
Move away from the camera.
-
Turn your torso 30-45 degrees.
-
Shift your weight to the back leg.
-
Leave space between your arm and your waist.
-
Lower your shoulders.
-
Slightly stretch upwards.
-
Move your chin slightly forward.
-
Take several shots in motion.
This is enough for your photo to look natural and show your body’s real proportions.
Common Mistakes
Sucking in Your Stomach Too Much
This makes your face and shoulders look tense, and your pose unnatural. It’s better to calmly exhale, stand up straight, and lightly engage your core.
Hiding Completely in Loose Clothing
Very baggy items do not always make you look slimmer. Sometimes they completely hide the silhouette and visually add bulk.
Using Strong Retouching
Filters can change the proportions of the face and body so much that the person no longer looks like themselves. Also, such photos can't be used to track progress.
Comparing Yourself to Professional Photos
Commercial and magazine shoots use staged lighting, stylists, makeup artists, professional equipment, and retouching. It's not fair to compare such images with random phone snapshots.
Drawing Conclusions from a Single Shot
A photo captures a split second. Closed eyes, an inhale, a hand gesture, or a crease in clothing can completely change the impression.
Main Points
To look slimmer in photos, you don’t have to hide your body or use filters.
Most of the time, it’s enough to:
-
increase the distance from the camera;
-
choose the right lens height;
-
slightly turn your torso;
-
shift your weight to one leg;
-
straighten your shoulders;
-
don’t press your arms to your body;
-
find soft lighting;
-
take several shots while moving.
A good photo doesn’t change your figure. It simply helps show it without accidental distortions.
And it’s better to assess real changes by tracking weight, measurements, how your clothes fit, and photos taken under identical conditions.